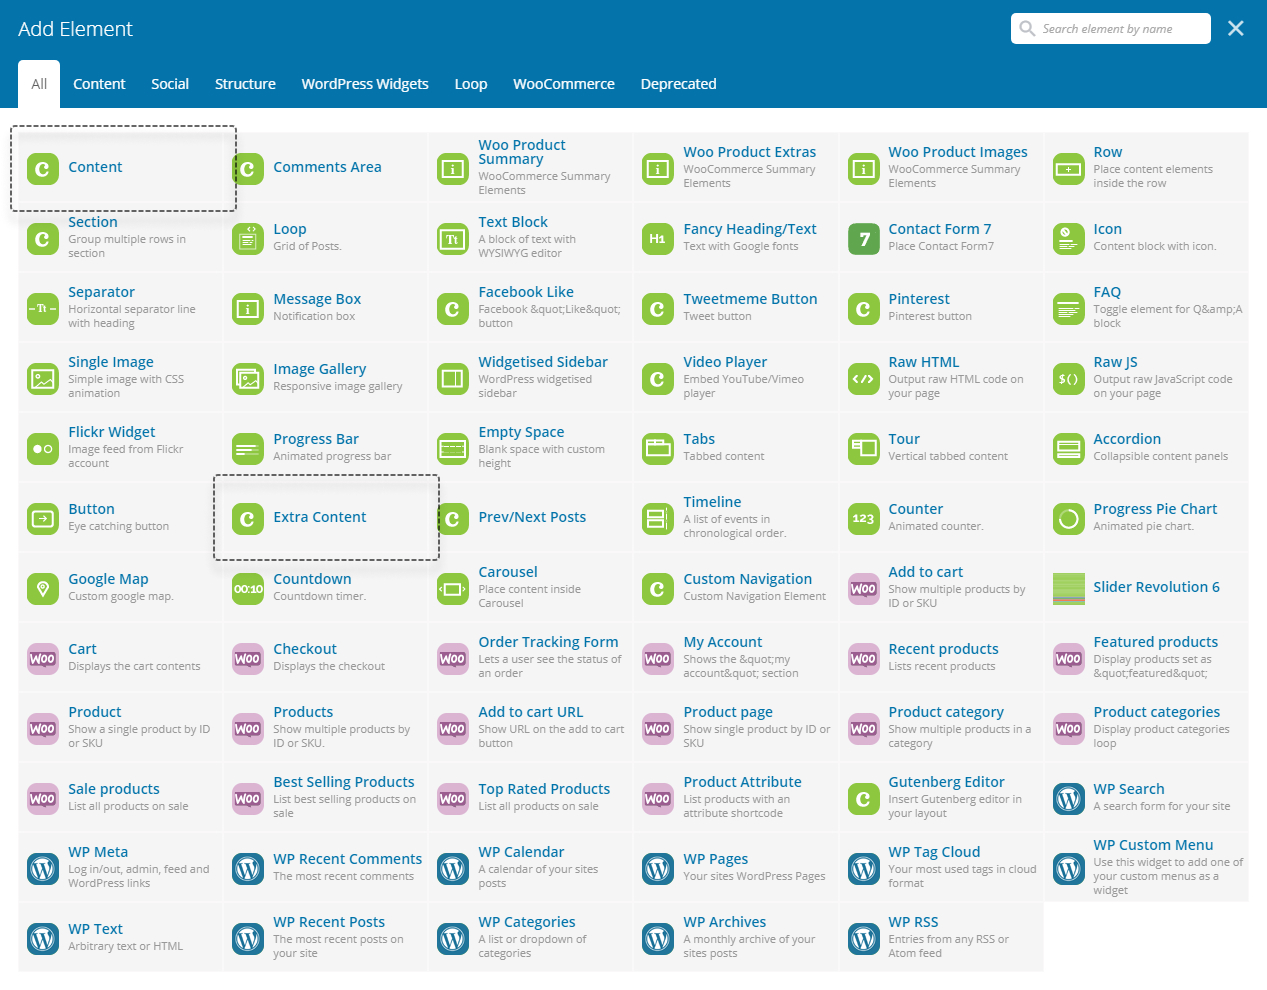
# Templates
# Table of content
# What is Template?
Omnis Template is unique for Omnis Theme feature. It allows you to create your custom layouts for different post types and assign them globally for all or selected pages.
Templates might have many purposes. They might be simple - overwrite some Global Theme Options with Templates Options or might be more complex - with Dynamic Content which insert your 'post' content into places you decided to be.
 What is Template?
Here you will find some examples of templates created for different post types:
# Post Templates
- Post – Large Centered Thumb
- Post – Large Side Thumb
- Post – 3 Content Columns
- Post – Splitted
- Post – Vertical Headers
# Project Templates
# Product Templates
# Search/Archive Templates
# How to use Templates?
To find Templates go to WordPress admin panel → Omnis → Templates.
INFO
Make sure you have installed and activated Omnis Core Plugin.
# Creating new Template
To create a new Template go to Omnis → Templates and click Add New Template button.
Omnis Theme allows you to create and modify Templates in Backend and Frontend Editors.
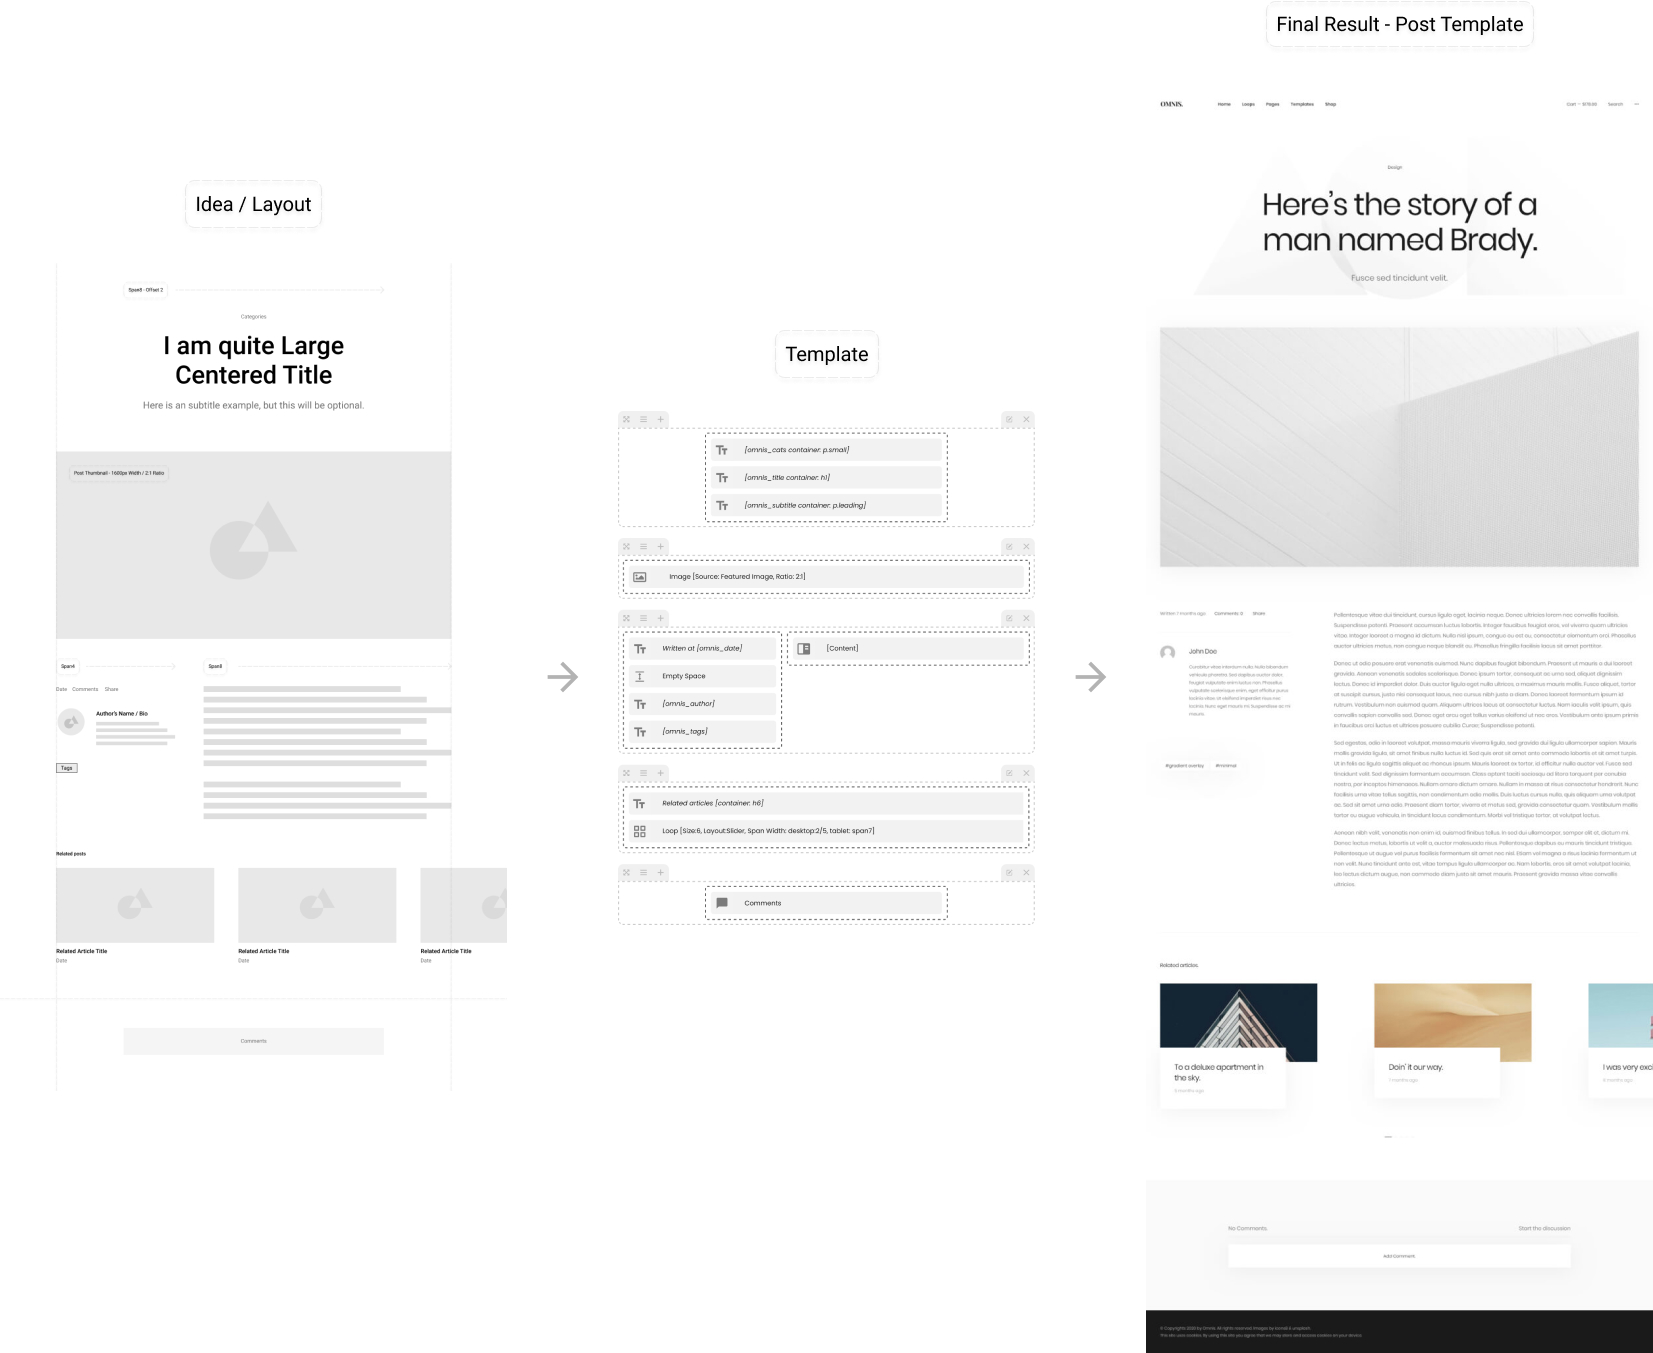
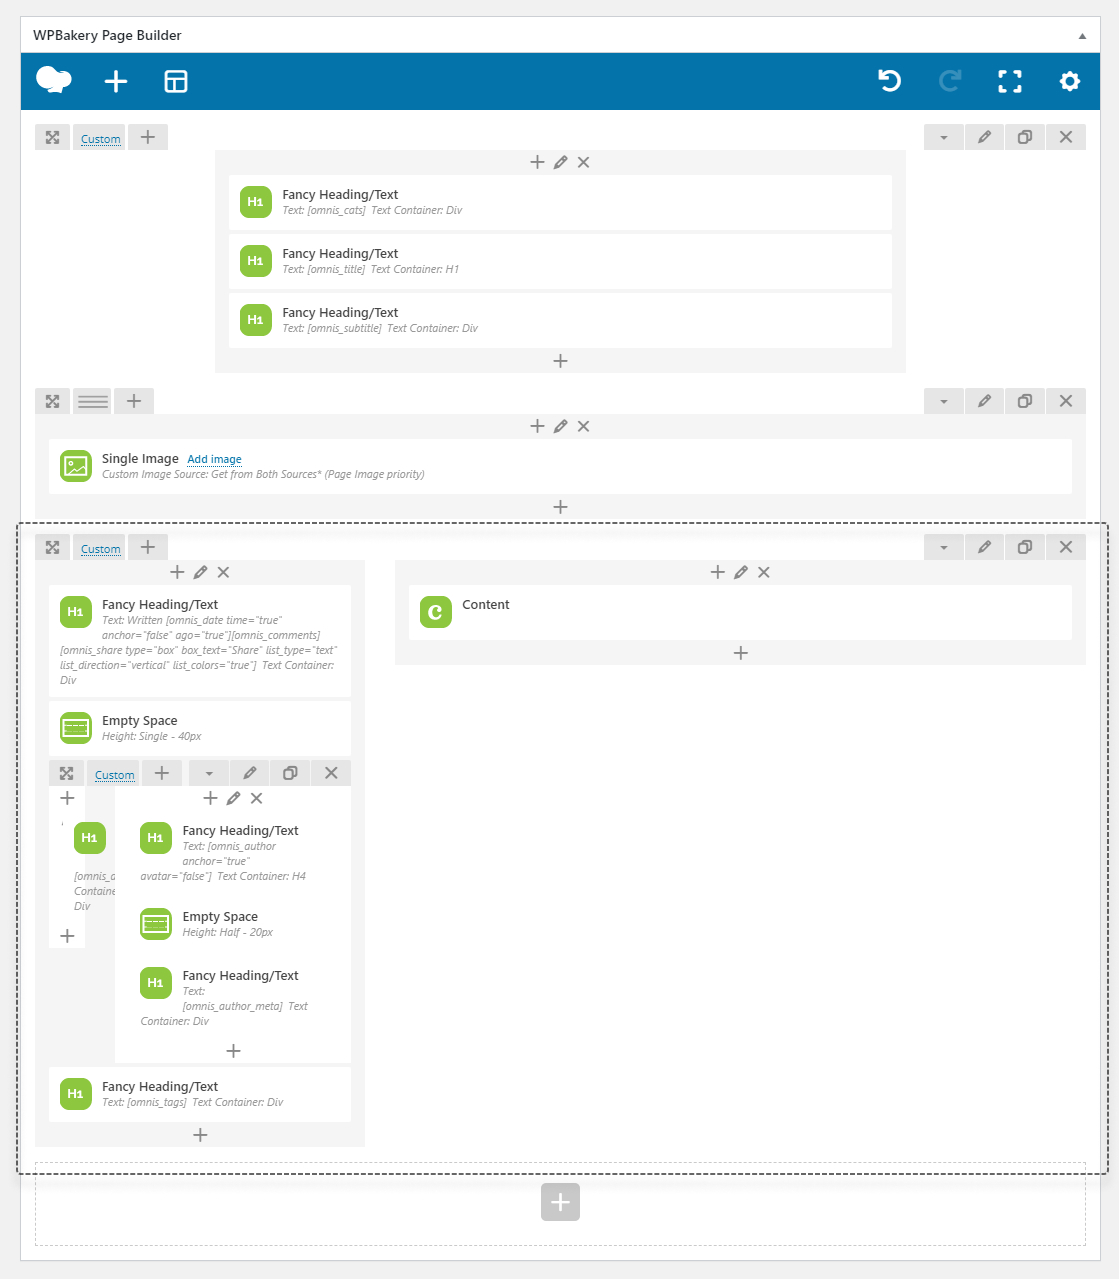
For example, we decided to create a new Post Template with Large Centered Title above Wide Thumbnail and Content Split into wider Article Text on the right and post data on Left. Additionally, there will be Slider Loop with 6 Related Items and centered comments section with a custom background.
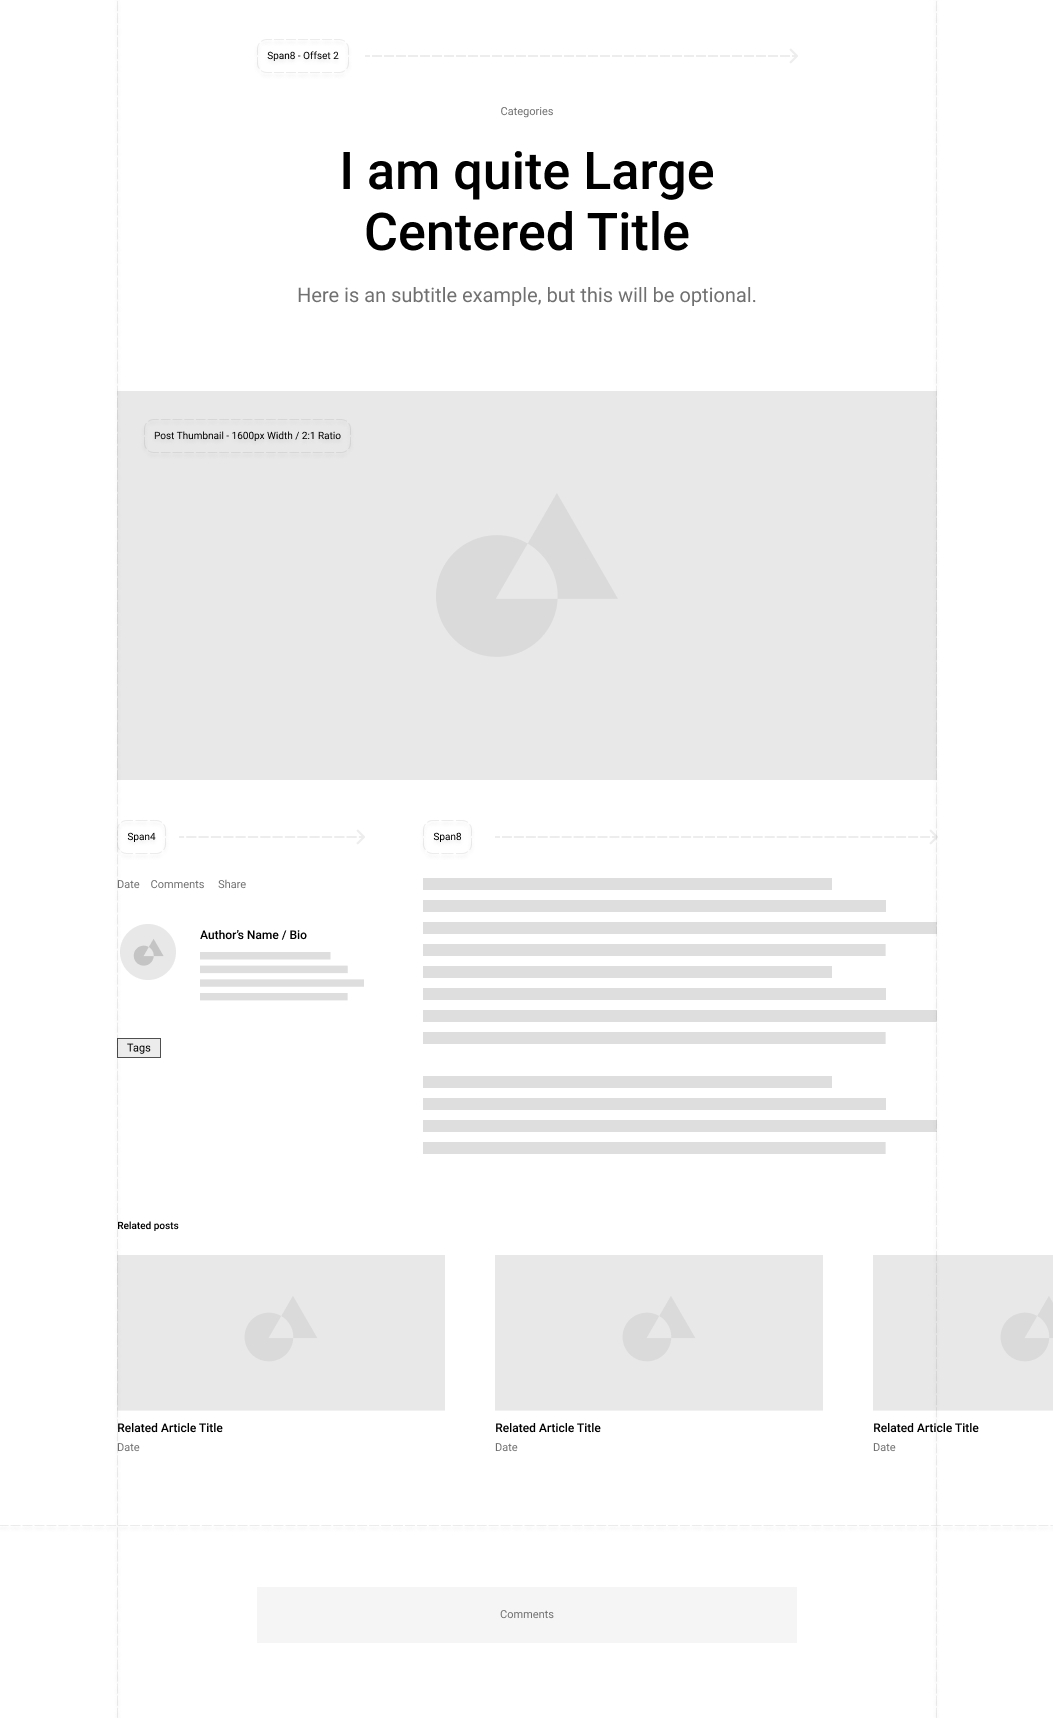 Layout for out Post Template
Type title for Template then select Template Type/Types. For our purposes, there will be Post type template named: Post - Centered Thumbnail, Splited Content.
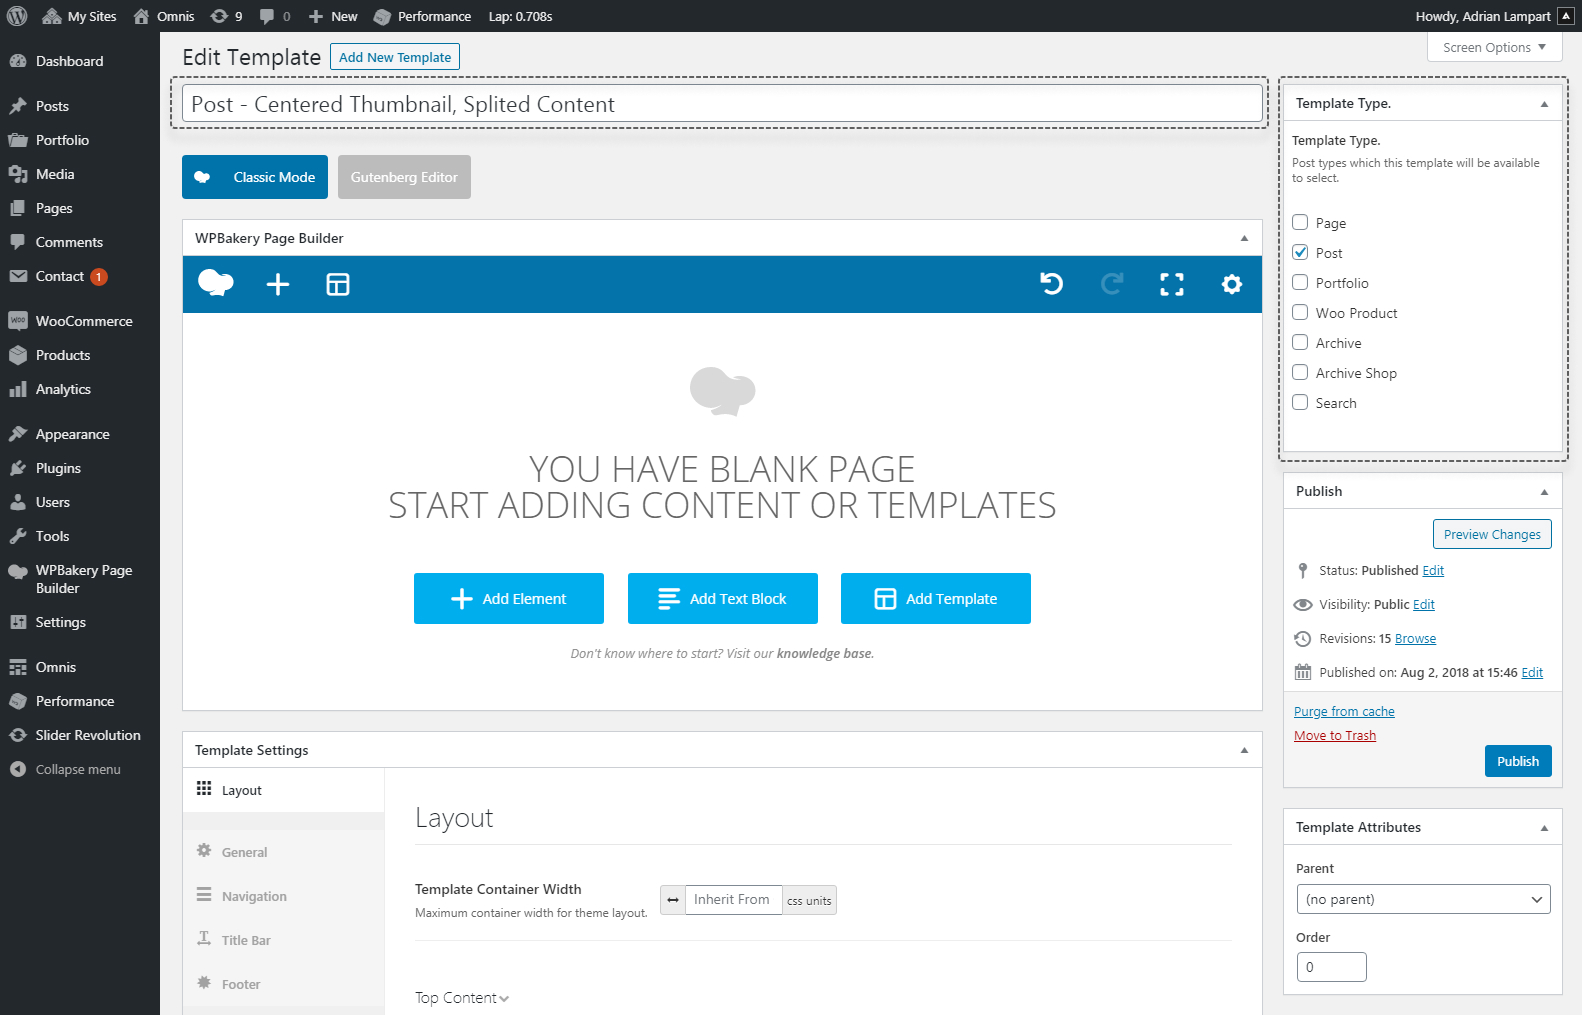 Post Type Template
Now you are ready to publish your first template.
# Custom options for Templates
Templates have many custom options which if set overwrites Global Settings. You will find them in Template Settings Panel.
For our Post - Centered Thumbnail, Splited Content template we overwrite some settings.
- First, we will change Content Row Padding to Triple (120px) in General → Content Row Padding
- Next in Title Bar we will disable default Title Bar - we will create Dynamic Content with our custom Centered Title bar
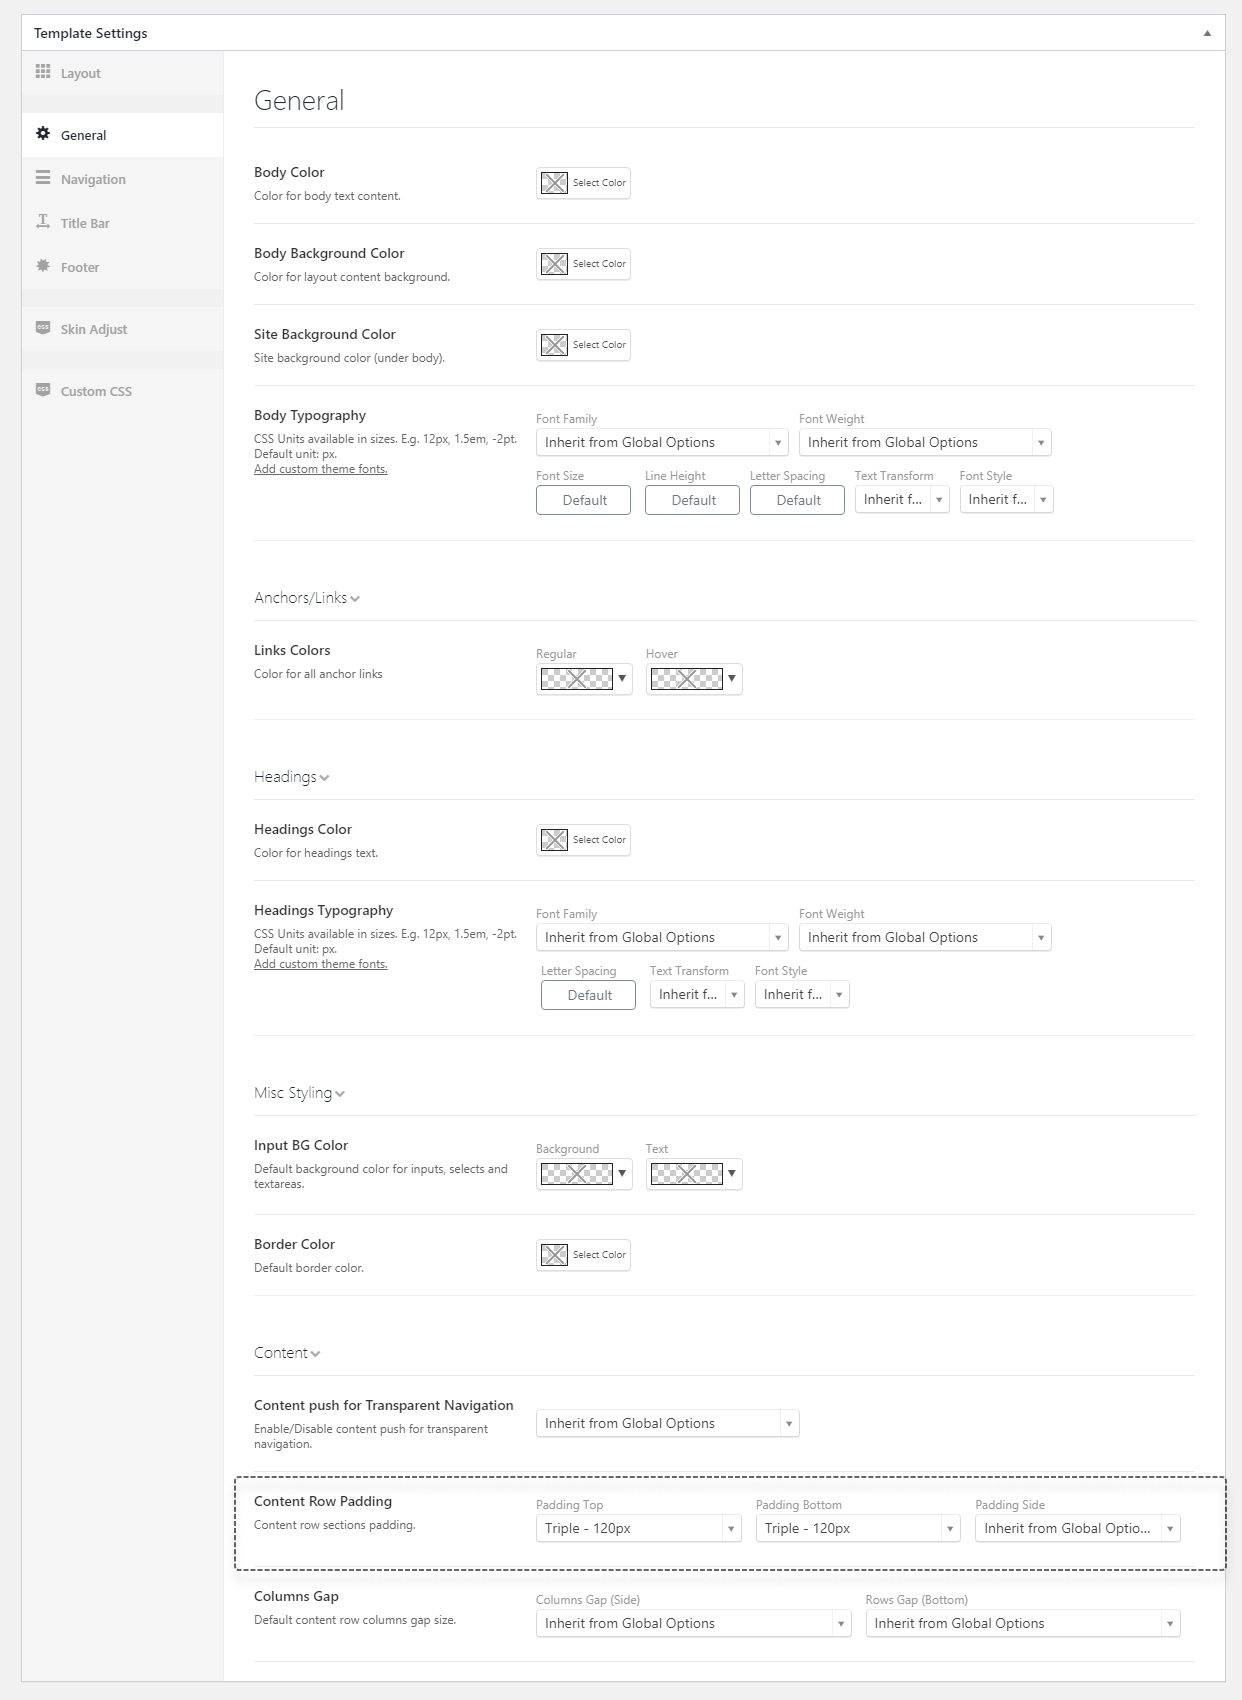 Change Content Row Padding
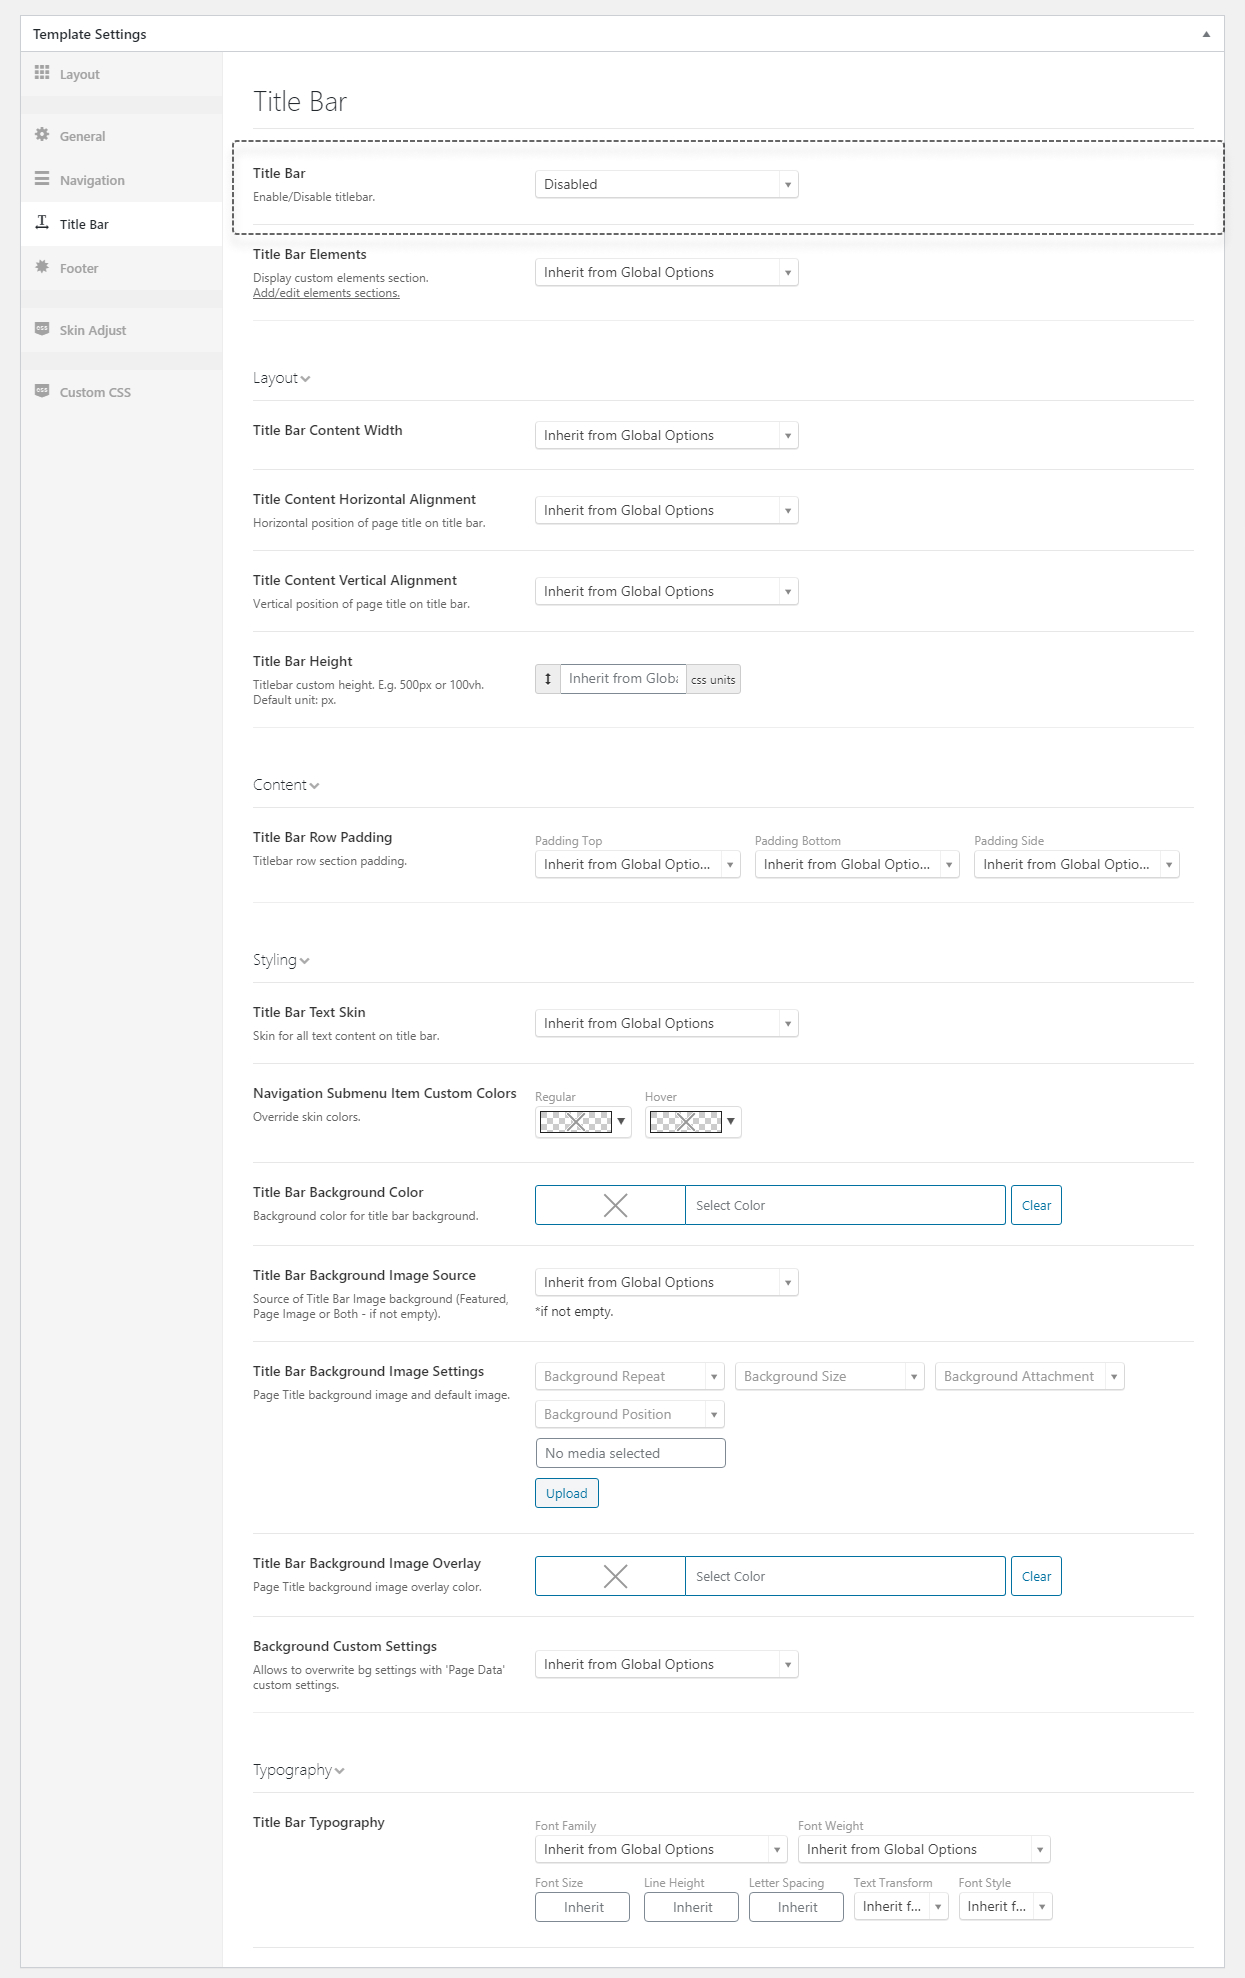 Disable Title Bar
# Dynamic Content
With dynamic content, you can create custom layouts for your templates, which means you can arrange your content the way you want.
Dynamic Content is made with special shortcodes.
Dynamic Data Shortocdes
Click here to learn more about Dynamic Data Shortcodes.
Click here to learn more about Templated Dynamic Shortcodes.
# Post Meta (Title/Subtitle/Meta etc.)
You can place all page data like Title, Subtitle, Post Categories, Author and more with Dynamic Data Shortcodes.
For our example, we will create our Title Bar Section with centered Title, Subtitle and Categories and Large Thumbnail under.
- For our Title Bar we will create new Row with Span8 and Offset 2 width settings.
- Next, we will use Fancy Header/Text as our Title, Subtitle, and Categories holder filled with right built-in shortcodes.
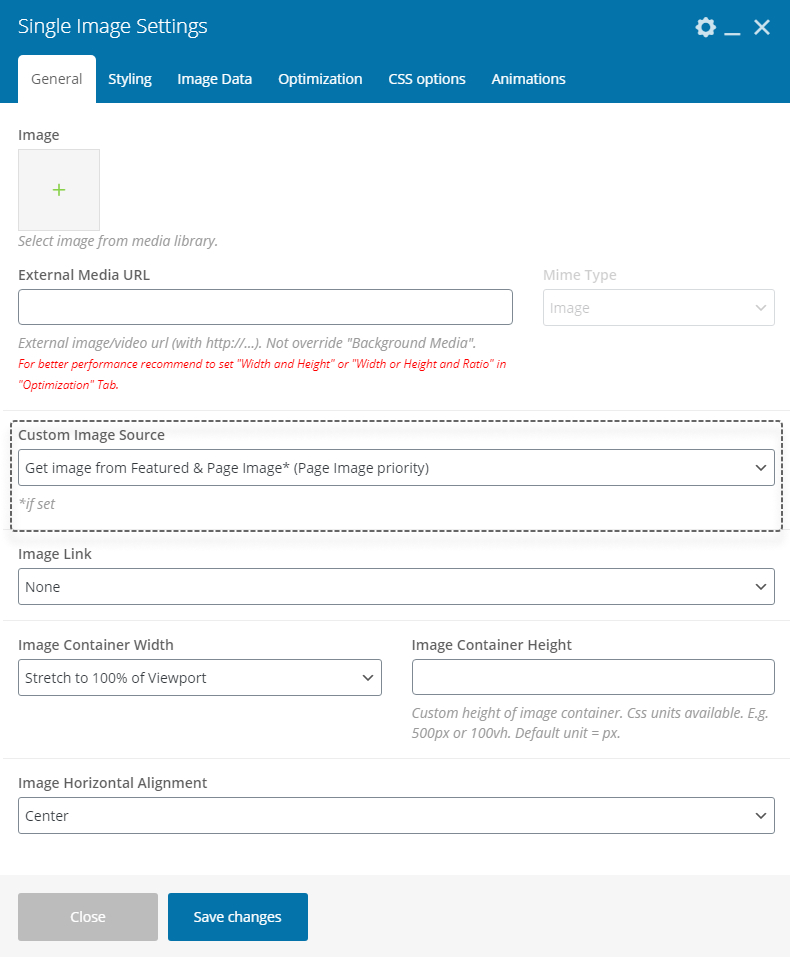
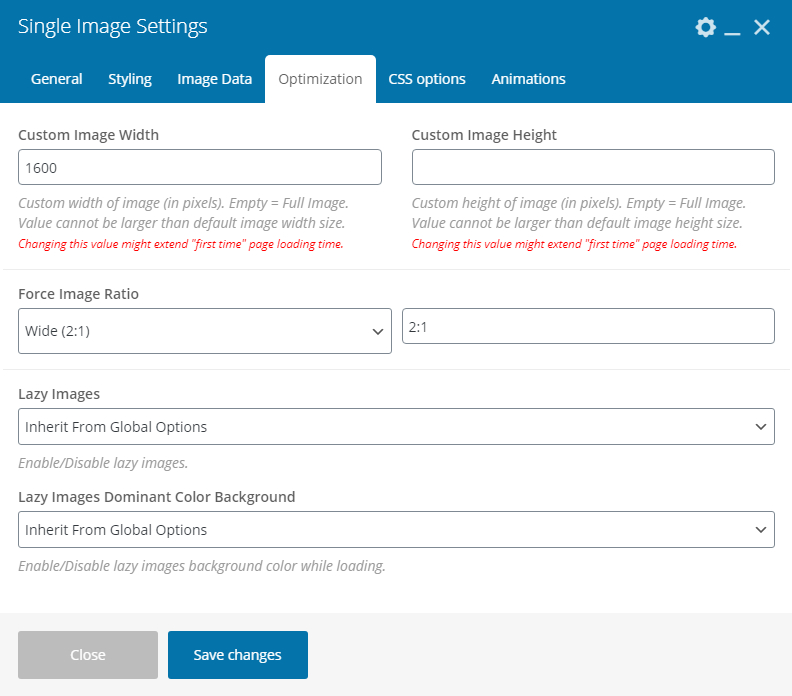
 Title Dynamic Content Holder
 - We will create Dynamic Thumbnail Image with 1600px Width and 2:1 Ratio. To do this set Custom Image Source to one of the available options. Also, we set Width and Ratio.
 Dynamic Thumbnail Source
 Dynamic Thumbnail Optimization
Your Custom Title Bar is ready.
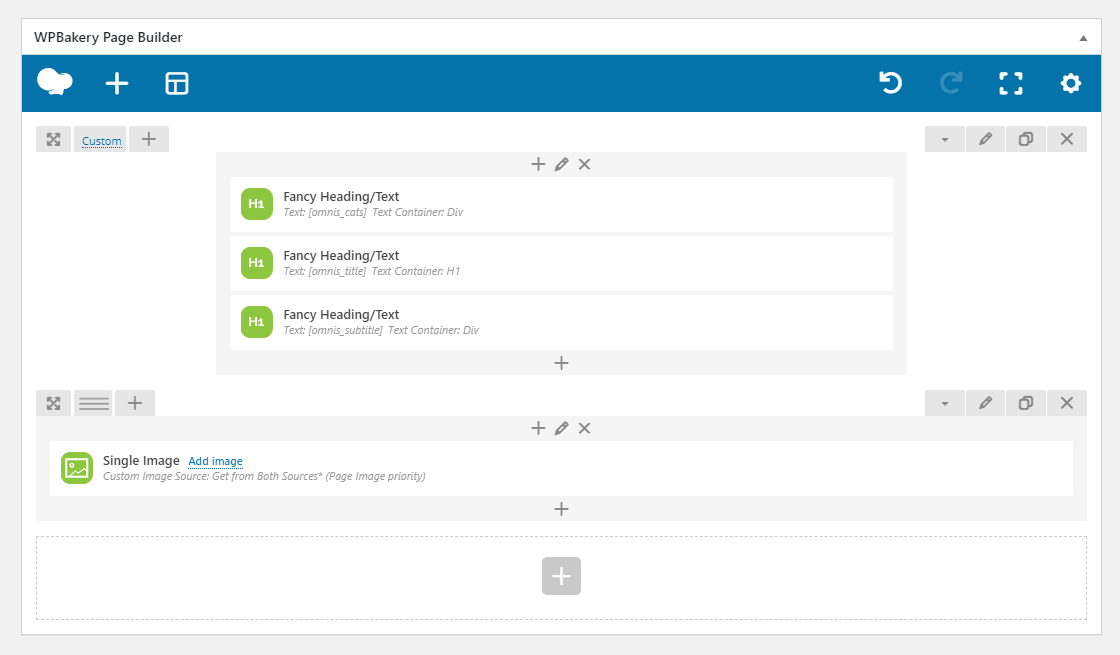 Custom Title Bar
See the code
[vc_row row_column_alignment_h="center" row_background_color="transparent" row_background_image="626" row_background_image_settings="position:center top|repeat:no-repeat|size:contain"][vc_column width="2/3" offset="vc_col-lg-offset-2 vc_col-sm-offset-2"][vc_custom_heading heading_text="`{`omnis_cats`}`" heading_typography="size-class:post-meta-holder"][vc_custom_heading heading_text="`{`omnis_title`}`" heading_container="h1"][vc_custom_heading heading_text="`{`omnis_subtitle`}`" heading_typography="size-class:leading-size"][/vc_column][/vc_row][vc_row row_section_padding="padding-bottom:none|padding-top:none"][vc_column][vc_single_image templates__image_source="both-page-image" image_container_width="block" image_alignment="center" image_shadow="drop-shadow" image_width="1600" image_ratio="2:1" css=".vc_custom_1540235064564{margin-bottom: 120px !important;}"][/vc_column][/vc_row]
Reusable Element
You can make Title Bar content reusable and easily accessible with Elements.
# Post Content Area
Templates allows you to arrange where your post/page content will be displayed. You can do this with special shortcodes - Content & Extra Content.
 Content Shortcodes
Info
Content Shortcode is optional in templates. If not set page content still will be displayed.
For our example, we decided to make content divided into two columns. Left (span4) with post data and right (span8) with post content.
- Add new Row with two columns (span4 + span8).
- For post data column we will add Fancy Header/Text filled with Dynamic Data Shortcodes
- In wider (span8) column we will inser our special Content shortcode. It will put our article content inside this column.
- Your custom content area is ready.
 Content Area Example
See the code
[vc_row row_columns_gap="triple"][vc_column width="1/3"][vc_custom_heading heading_text="Written `{`omnis_date time=``true`` anchor=``false`` ago=``true```}``{`omnis_comments`}``{`omnis_share type=``box`` box_text=``Share`` list_type=``text`` list_direction=``vertical`` list_colors=``true```}`" el_zindex="10" el_class="title-bar__meta font-size-small"][vc_empty_space empty_height="single"][vc_row_inner row_section_padding="padding-top:single|padding-side:none" css=".vc_custom_1533219195089{border-top-width: 1px !important;border-top-color: rgba(0,0,0,0.05) !important;border-top-style: solid !important;}"][vc_column_inner width="1/5"][vc_custom_heading heading_text="`{`omnis_avatar`}`"][/vc_column_inner][vc_column_inner width="4/5"][vc_custom_heading heading_text="`{`omnis_author anchor=``true`` avatar=``false```}`" heading_container="h4"][vc_empty_space empty_height="half"][vc_custom_heading heading_text="`{`omnis_author_meta`}`" heading_typography="size-class:font-size-small"][/vc_column_inner][/vc_row_inner][vc_custom_heading heading_text="`{`omnis_tags`}`" css=".vc_custom_1533219204404{margin-top: 80px !important;}"][/vc_column][vc_column width="2/3"][omnis_content][/vc_column][/vc_row]
# Related Loop
There is also an option to easily create related post grid which is a great way to display posts related to your article or project. All you need to do is to add Loop Shortcode with settings you want. That's it.
For our example, we will create Slider Loop with 6 Related Posts:
- Create Row with one column.
- Add Loop Shortcode with Post Count: 6 and Grid Layout: Slider. We want our loop to overlap our viewport, so we will set Grid Column Span Width to Span2/5 - 40%.
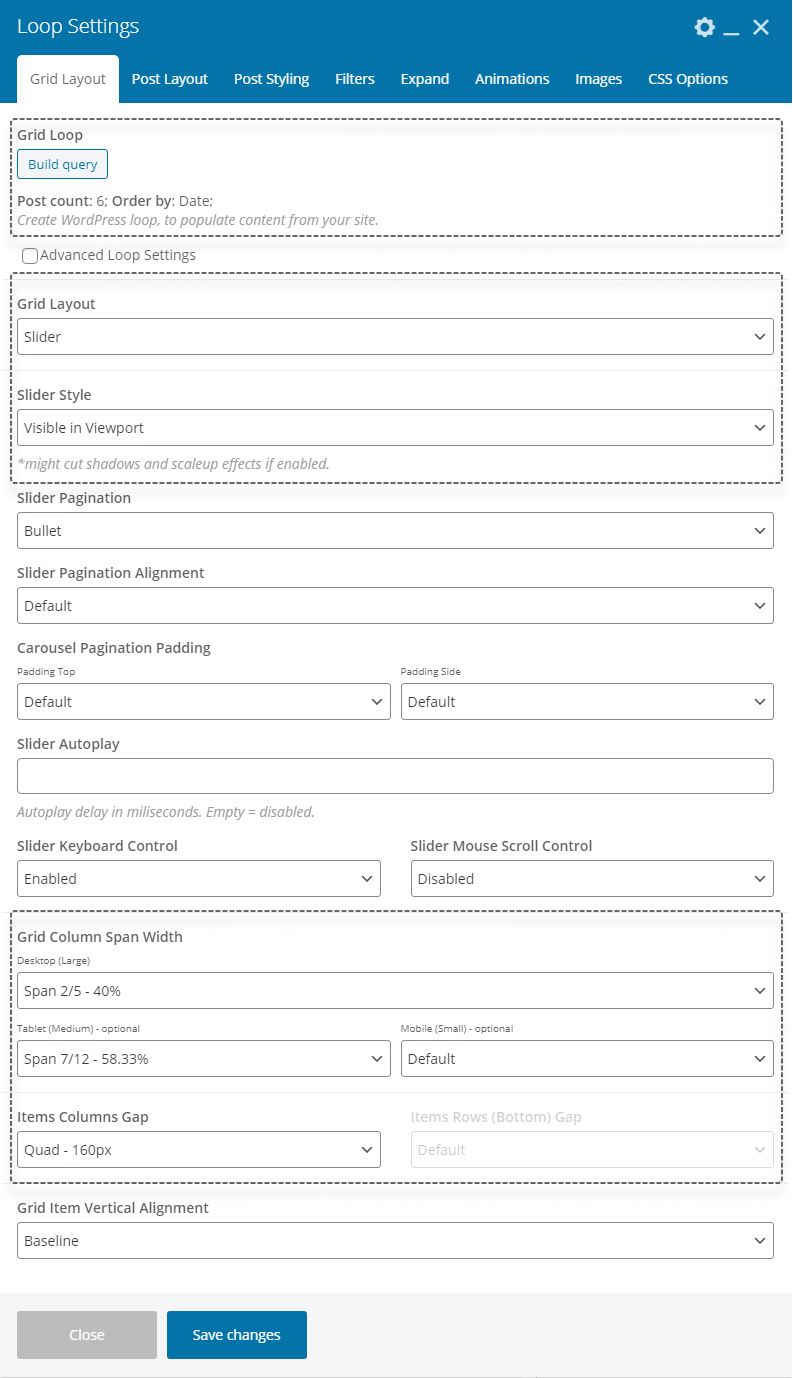 Loop Slider
 - Additionally, we will create Text Block Shortcode with the right label for our Related Posts.
- That's it.
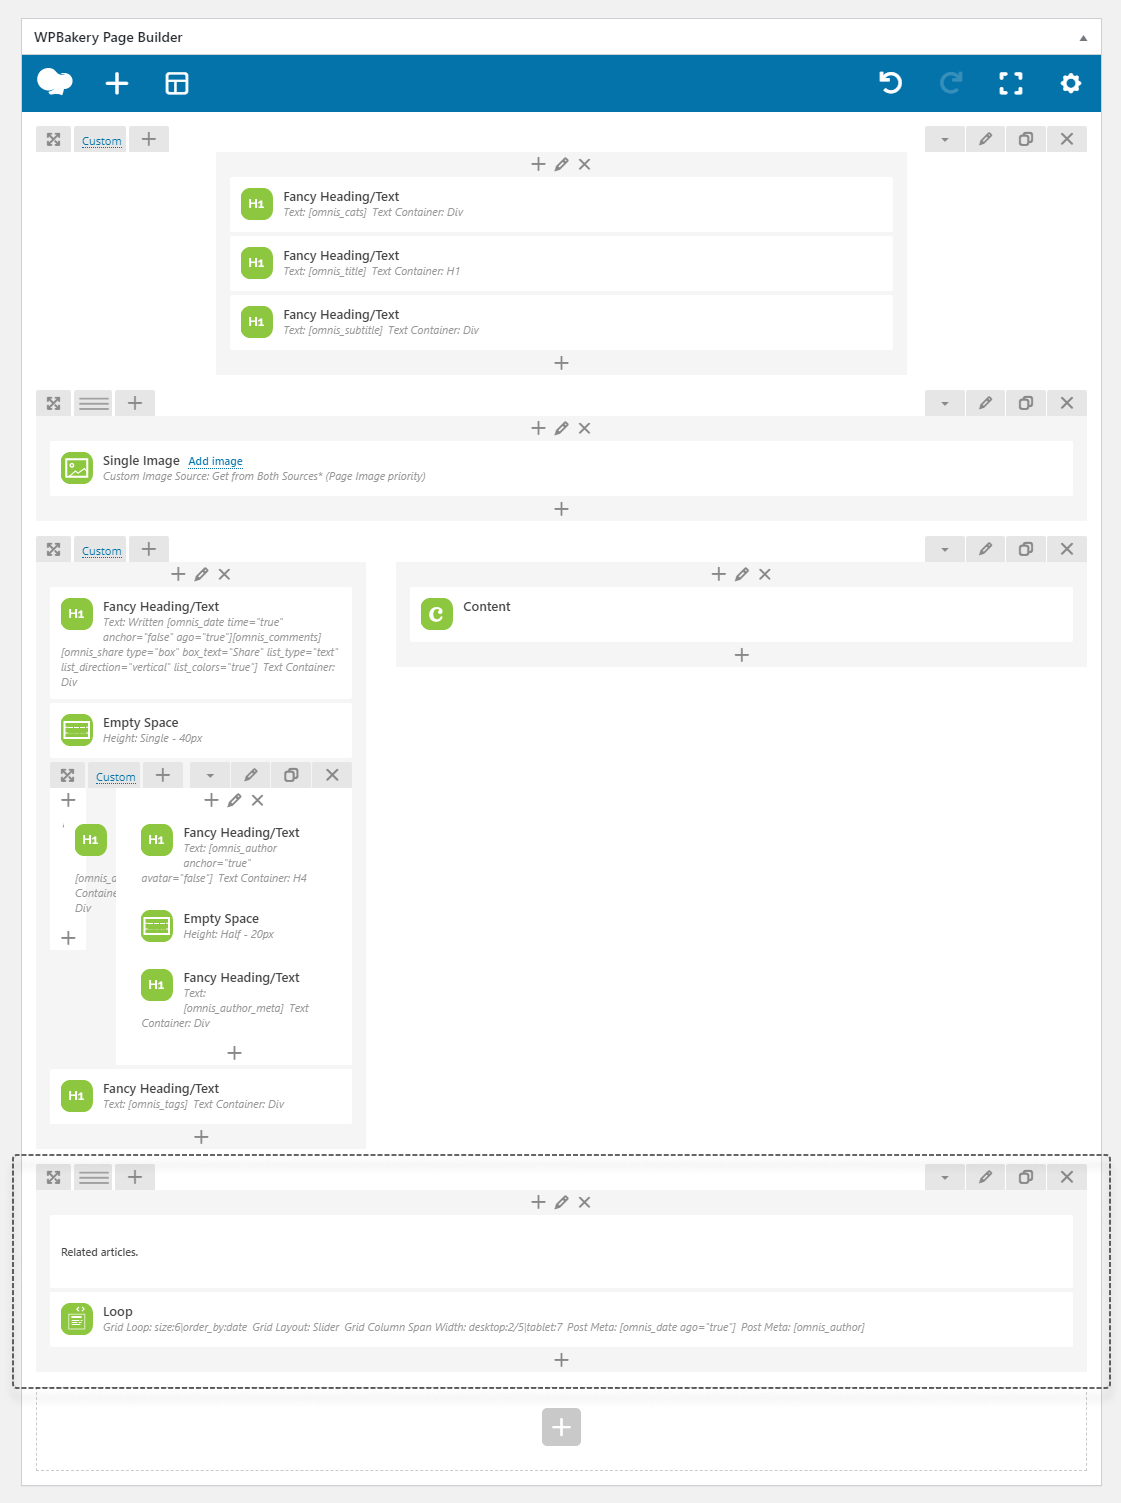 Related Articles Area
See the code
[vc_row][vc_column column_padding="padding-top:double" css=".vc_custom_1562061328944{border-top-width: 1px !important;border-top-style: solid !important;}"][vc_column_text]
<h5>Related articles.</h5>
[/vc_column_text][loprd_loop loop="size:6|order_by:date" grid_layout="slider" _grid_columns="desktop:2/5|tablet:7" grid_columns_gap="quad" grid_alignment_v="baseline" post_layout_ratio="2:1" post_meta="`{`omnis_date ago=``true```}`" post_styling_setting="content" post_content_bg_color="#ffffff" post_content_skin_custom_meta="rgba(0,0,0,0.4)" post_content_push="top:single" post_content_max_width="80" animation="from-right" animation_delay="200"][/vc_column][/vc_row]
# Comments Area
Last, but no least - you can arrange where and how comments are will be displayed. You can do it by adding Comments Area shortcode to your template structure.
 Comments Area Shortcode
For our example, we will create Comments Area with the same column width as Title Bar, and with Custom Background:
- Create new Row with Span8 and Offset 2 width settings and custom background color.
- Inside that column add Comments Area Shortcode.
- Your custom comments area is ready.
 Comments Area Example
See the code
[vc_row row_background_color="#fafafa"][vc_column width="2/3" offset="vc_col-lg-offset-2 vc_col-sm-offset-2"][omnis_comments_area][/vc_column][/vc_row]
 Example of Template in Front-End Edior
# More Dynamic Data
# WooCommerce
For WooCommerce product templates there is a few special shortcodes you should use creating your customized product template.
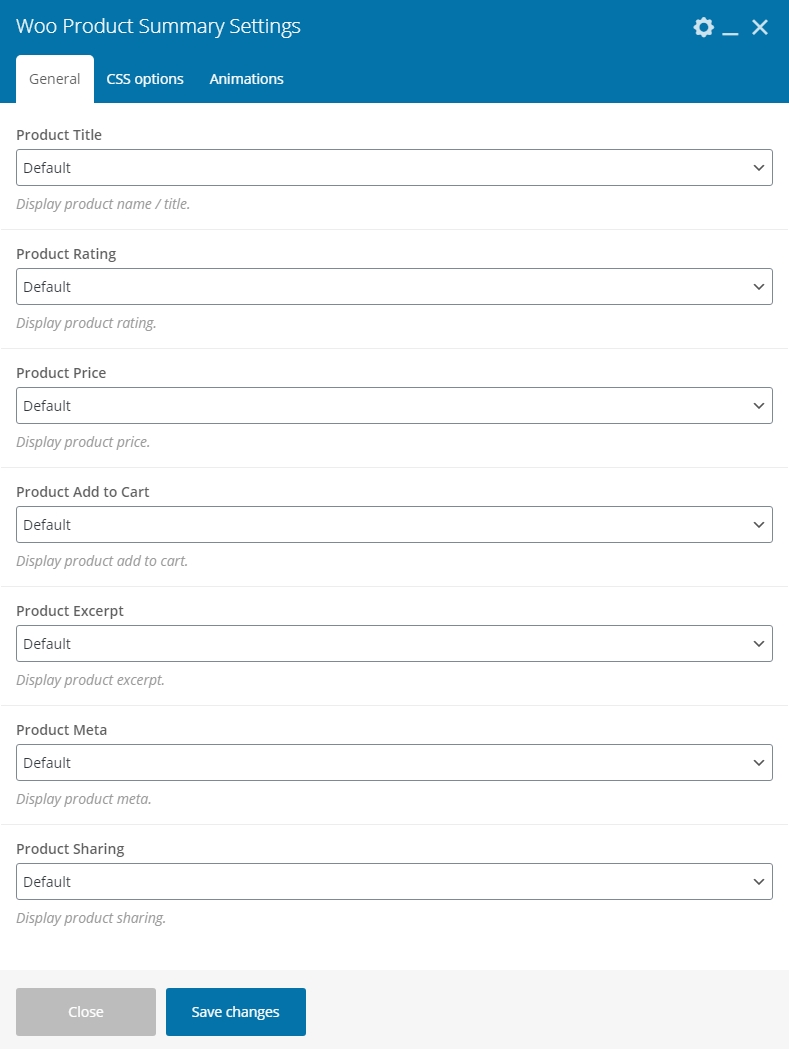
# Woo Product Summary
This shortcode contains all basic data about product like Title or Price. You can show or hide selected elements.
 Product Summary Shortcode
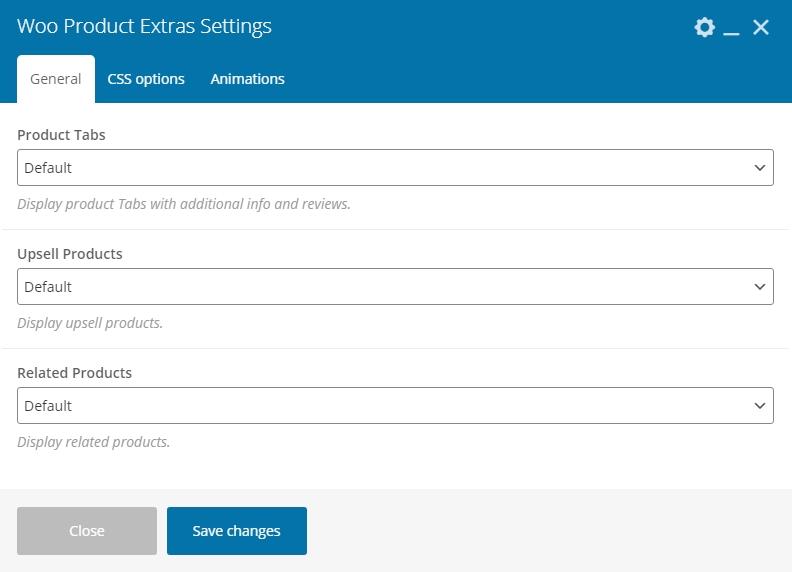
# Woo Product Extras
This shortcode is resposible for displaing fields like Tabs with addotional info and reviews, also allows you to display Upsells and Related Products.
 Product Extras Shortcode
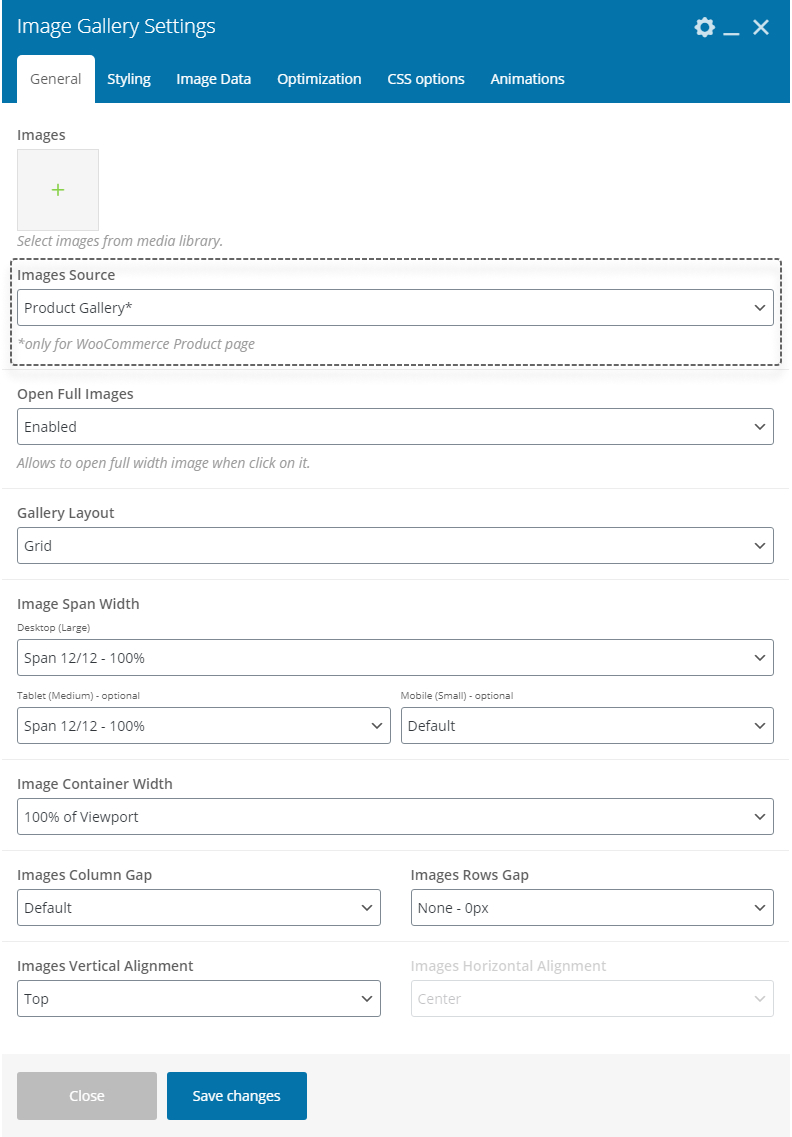
# Woo Product Images
For product gallery there is a two ways to display them. First with Shortcode Woo Product Images which display classic WooCommerce Product Gallery.
 Product Images Shortcode
Anonther is more advanced - allows you to customized it the way you want. Just add Gallery Shortcode with Product Gallery as your Source.
 Gallery with Product Images as Source
# Assigning Templates
To assign Template Globally for Post Types go to Omnis → Theme Options → Templates and select Post Type and your Template.
 Assigning Templates Globally
Also, there is an option to select Template only for a particular post/page. To do that in Edit Mode for selected page/post and select your Template.
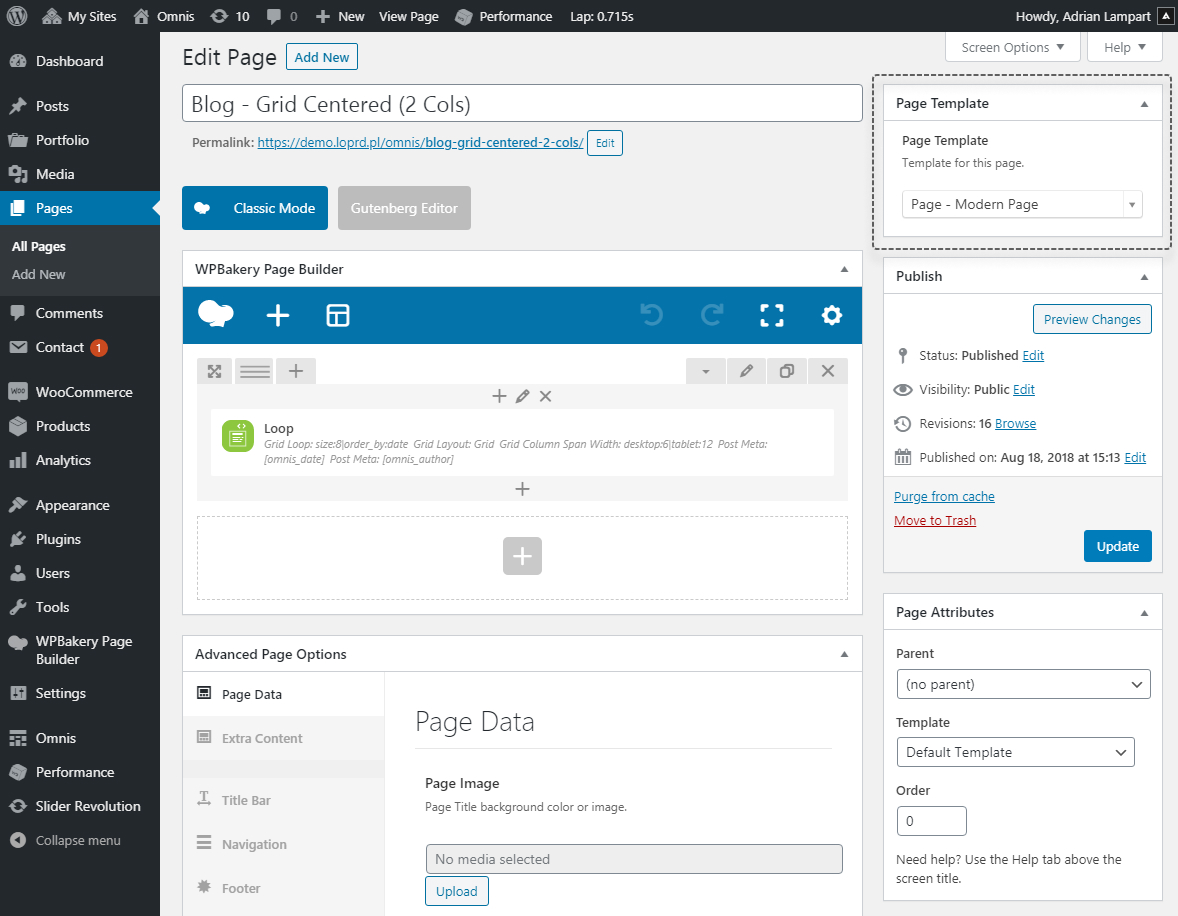 Assigning Template for Page