# Elements
# Table of content
# What is Element?
The Elements is Omnis Theme feature which allows you to save predefined sets of elements as a template and then reuse it when you’ll need it. With Elements you will be able to save tones of time - you don't need to create specific layout over and over again.
Omnis Studio
With Omnis Studio you can import hundreds of predefined Elements with just one click.
# How to use Elements?
Elements can be placed in many different places which allows you to create and modify your layouts fast and easy.
# Creating new Element
All Elements you will find in Omnis → Elements in the WordPress admin panel.
Elements can be simple text or be builded with Page Builder.
To create a new Element click Add New Element button. Now, there is plenty of possibilities.
# Elements with Page Builder
There are two ways to use Elements with Page Builder.
The first way is to use Element as a Row Content Block. To make it add Row Shortcode and open Row Settings. Now you can select your desired Element and Row will be replaced with the content of your Element.
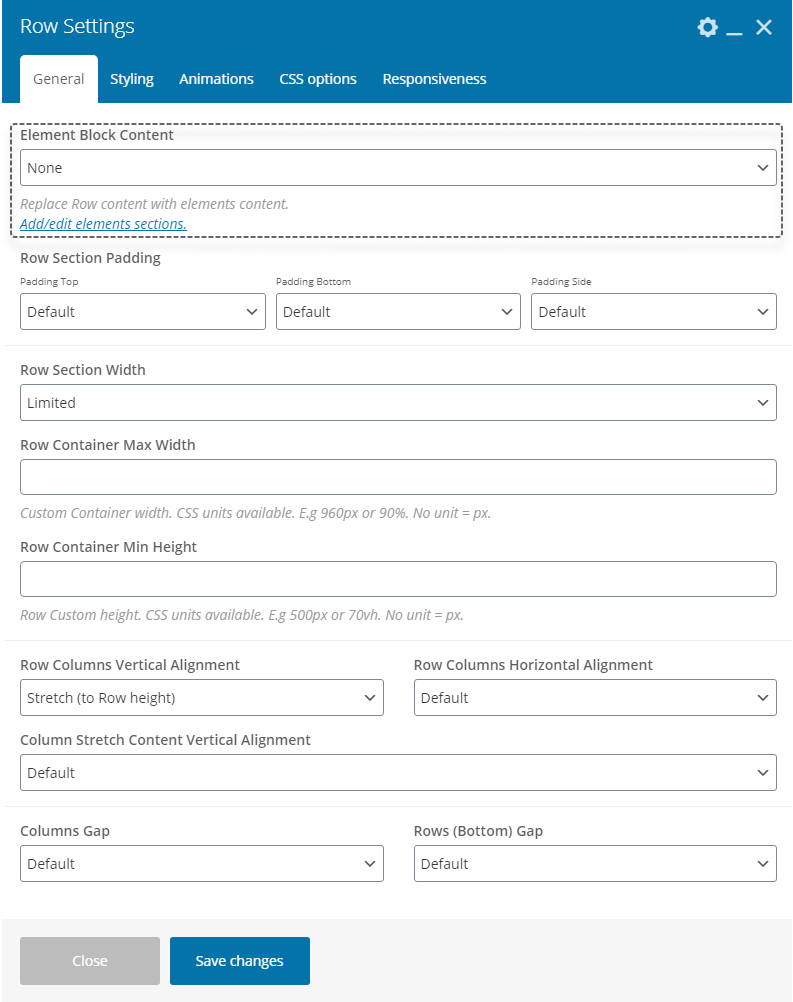 Elements in Row
Another way is to add instant modifiable Element content instance (independent from Elements). To do that in Page Builder (Backend editor) click Templates button.
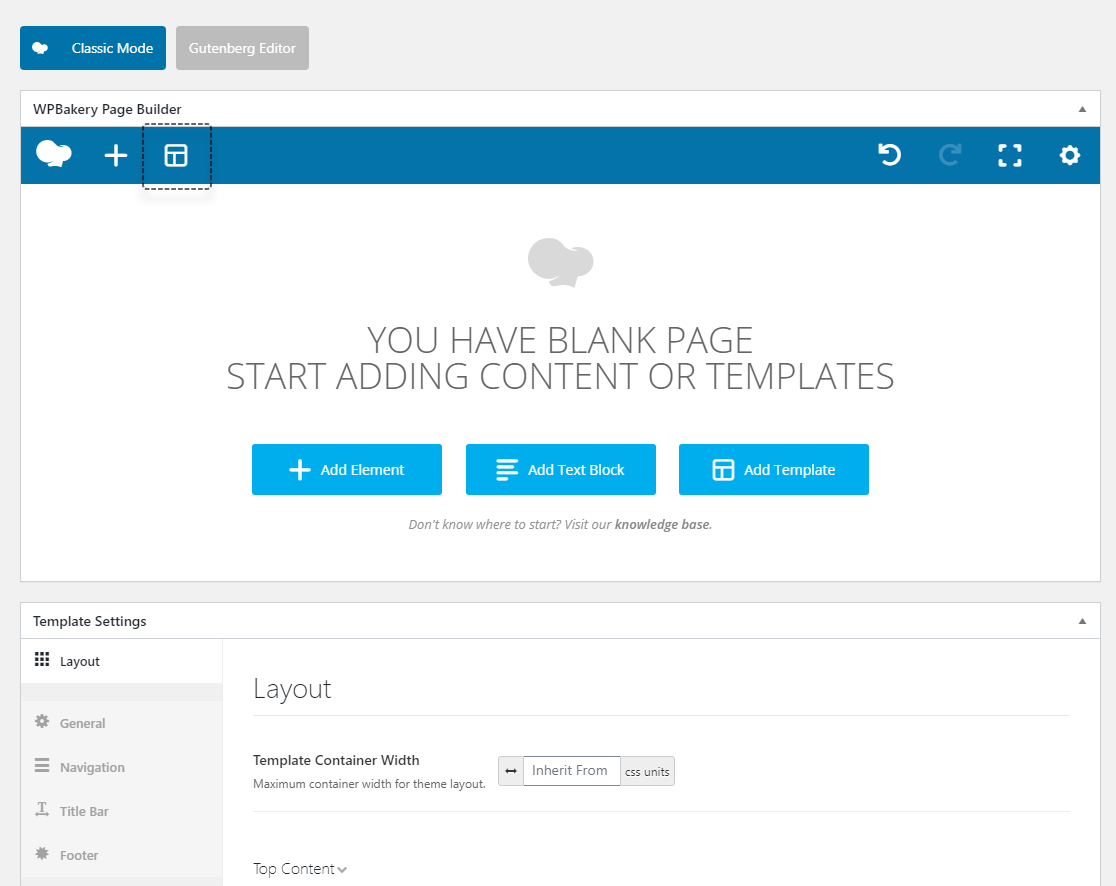 Templates button
Now in Theme Templates tab you can preview and add your desired Element content to your page structure.
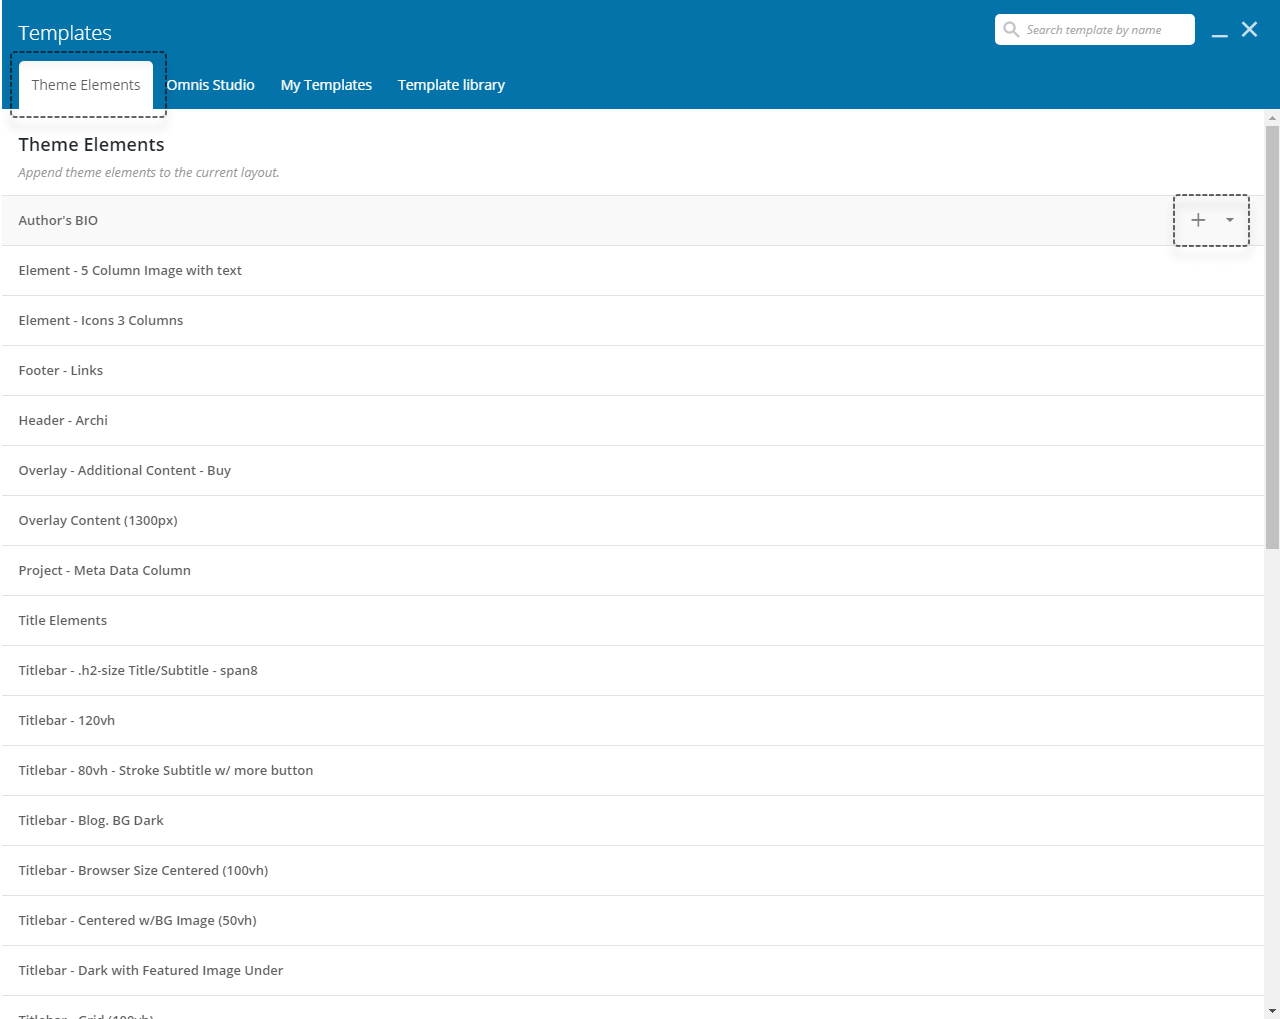 Elements list
# Overlay Content
Elements can be also displayed as Overlay Content. Overlay Content is a special place on your website where you can place additional content and it is opened from you Navigation Menu.
Creating Overlay Content takes two steps.
Go to Global Theme Options - Omnis → Theme Options → Layout in the WordPress admin panel. Find Overlay Content Elements field and select your Element and position where you want your content to be displayed.
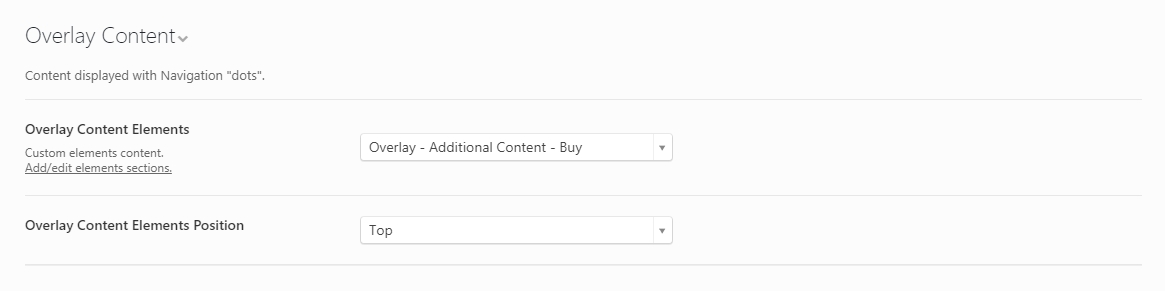 Overlay Content Settings
TIP
Optionally with Templates you can set Overlay Content only for selected pages (not globally).
Go to Appearance → Menus and add Overlay Content or Overlay Content Dots Menu Item to your selected Menu.
# Example
# Top Content
Elements can be also displayed as an additional content for your Navigation. For example, Above Content is a great place to put large Hero Content for your portfolio page. Under Content can be a great place for your large logo image. Sky is the limit.
To add Top and Bottom Content go to Omnis → Theme Options → Layout in the WordPress admin panel and find Top Content fields.
Optionally, you can set Top Content Elements only for selected Pages or Templates.
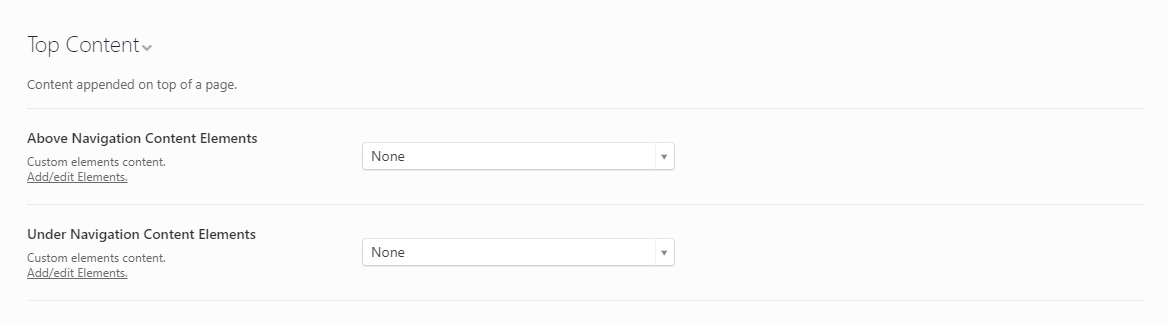 Top Content Fields
# Example
# Title Bar with Elements
With the Elements, you can easily create your own highly customizable Title Bars.
To set your custom Title Bar go to Omnis → Theme Options → Layout → Title Bar in the WordPress admin panel and find Title Bar Elements field.
Optionally, you can set custom Title Bar Elements only for selected Pages or Templates.
 Title Bar Elements Settings
Dynamic Content
To create more dynamic and complex Title Bar we recommend to use Dynamic Data Shortcodes like [omnis_title], [omnis_subtitle] and more.
# Footer with Elements
Also, with the Elements, you can easily create your own highly customizable Footer.
To set your custom Footer go to Omnis → Theme Options → Layout → Footer in the WordPress admin panel and find Footer Elements field.
Optionally, you can set custom Footer Elements only for selected Pages or Templates.
 Footer Elements Settings
Info
Title Bar and Footer Elements are part of page content structure and are subjects to the same 'padding collapsing behavior' as Rows.
# Elements in Text Editor (TinyMCE)
Last, but not least you can easily insert and modify your Elements content to TinyMCE editor. Just click Elements button and select your desired Element.
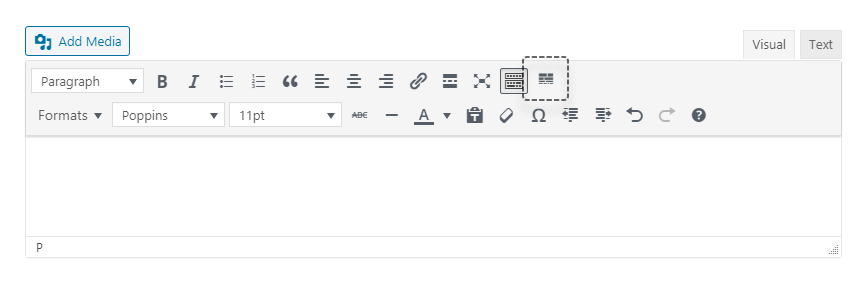 Adding Elements to TinyMCE Editor